What keeps first-time builders safe during assembly?
Unpacked frame parts and borrowed drills make beginners nervous. One slipped workpiece or bad lift can ruin the day. This guide covers plain safety basics.
Published
First-time builders stay safe by wearing eye protection and closed safety footwear, clamping workpieces before drilling, inspecting cords and batteries before use, assessing manual handling risks, and having an organiser allow enough time, brief everyone, and keep exits clear.

You do not need a trade ticket to assemble basic frame furniture or set up a room, provided you follow the supplier's manual and respect a few workshop rules. Below are the four areas to sort out before anyone picks up a tool.
What safety gear do first-time builders need?
Beginners often start assembling in sandals and street clothes. A flying metal shaving or a dropped tool quickly turns a casual task into an injury.
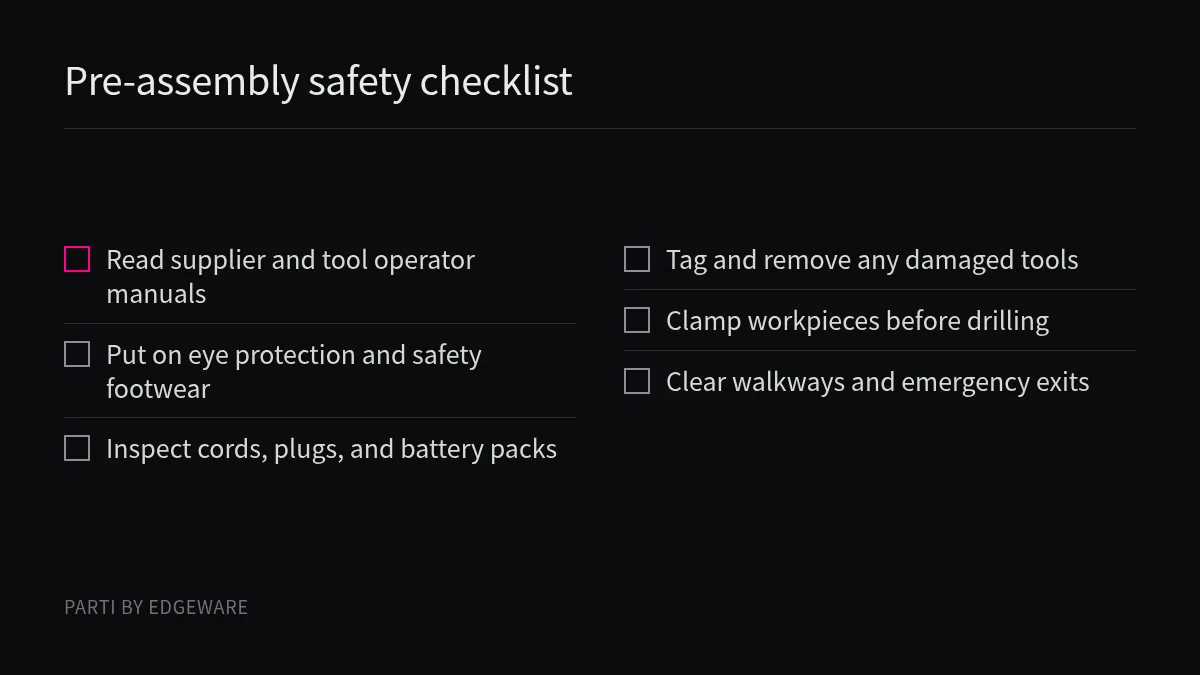
Wear personal protective equipment matched to the task, starting with safety glasses or goggles (or a face shield over them), appropriate gloves, and safety boots or shoes. Add hearing or respiratory protection whenever the tool or material calls for it.
Matching gear to the job
In Canada, the Canadian Centre for Occupational Health and Safety (CCOHS) sets out in its basic electric tool safety guidance1 that workers should wear personal protective equipment and clothing suited to the job. That list includes safety glasses or goggles, or a face shield worn together with safety glasses or goggles, plus hearing protection, respiratory protection, gloves, safety boots or shoes, or rubber boots where appropriate. Other places have different rules, and your own contract and local authority decide what is required on your site.
When you are preparing for your first drill build, eye protection comes first. The CCOHS fact sheet on powered hand drills2 states that you should wear safety glasses or a face shield (with safety glasses or goggles) whenever operating a drill.
Inspecting tools and batteries before you start
Protective gear only does half the job; the tool itself has to be sound. Before each use, CCOHS advises inspecting tools for any damage:
* Check the handle and body casing for cracks or other damage, and confirm auxiliary or double handles are installed securely. * Inspect power cords for cracking, fraying, or faults in the insulation, and check plugs for cracks or missing, loose, or faulty prongs. * Inspect batteries for cracks, leaks, or swelling, and make sure terminals are clean and free of corrosion. * Check for damaged switches or faulty trigger locks. * If a tool is defective, remove it from service, tag it clearly as "Out of service", replace it immediately, and leave repairs to a qualified person instead of attempting field repairs.
Follow the operator's manual for batteries as well. Use only the battery specified by the manufacturer and recharge it only with its intended charger. Avoid overcharging or extreme temperatures, and store battery packs where metal parts like nails, screws, or wrenches cannot touch the terminals and cause a short, sparks, fires, or burns.
How do you stop a build from tipping or slipping?
Holding a small part in one hand while pushing a spinning drill with the other feels fast. If the bit catches, the part spins into your wrist.
Clamp or support workpieces so both hands can control the tool, never drill with one hand while holding material with the other, keep proper footing without overreaching, and follow the supplier's assembly instructions so the finished structure is never overloaded.
Securing the workpiece and controlling the drill
Many beginner injuries happen because the material moves when the tool bites. In Canada, CCOHS drill and electric tool guidance gives clear rules for keeping the workpiece and the tool under control:
| Hazard area | What to do | What to avoid |
|---|---|---|
| Workpiece stability | Secure the workpiece being drilled to prevent movement; use clamps, a vice, or other devices to hold and support it so both hands control the tool | Never drill with one hand while holding the material with the other; do not reach under or around the stock being drilled |
| Bits and chucks | Select sharp bits that match the drill capacity and material; ensure bits are properly seated, tightened, and turn true; remove the chuck key and adjusting wrenches before starting | Do not use bent bits, exceed recommended drilling capacities, or try to free a jammed bit by starting and stopping the drill (unplug it first) |
| Body position and site | Keep proper footing and balance; keep drill air vents clear; keep cords clear of the cutting area and tool path | Do not overreach, do not use excessive force into hard material, and do not use an electric drill in wet or muddy locations |
Before changing or adjusting any bit or accessory, switch off the tool and disconnect the power supply or remove the battery.
Keeping the structure stable during assembly
When you are building furniture from frame profiles, stability also applies to the frame itself as it grows. We do not know which profile system or fasteners you have on your table, so we never guess at load ratings or joint methods. Always read and follow the supplier's instructions for assembly sequence, fastening, and support. Build on a flat, clear surface, check that each connection is seated the way the supplier specifies before adding upper sections, and never overload the structure during or after assembly.
If you are using corded tools, CCOHS also notes that tools must be properly grounded with a three-prong plug in a grounded outlet, be labelled as double-insulated, or use a low-voltage isolation transformer. Never remove the third grounding prong, and use only approved extension cords of the proper wire gauge (marked "W-A" or "W" for outdoor work). If a cord feels more than comfortably warm or a tool sparks, stop and have an electrician or qualified person check it.
How do you lift and carry parts?
Boxes of parts and assembled frames look manageable until someone twists their back in a doorway. Strains happen quietly and can sideline a helper for weeks.
Assess manual handling tasks before lifting by checking the load, the route, and who is carrying it. Use simple risk filters for lifting, lowering, carrying, pushing, and pulling so no one lifts beyond their capability or handles awkward frames alone.
Assessing the lift before moving anything
Even when individual bars or panels feel light, bundled cartons and completed frames can be awkward. In Great Britain, the Health and Safety Executive (HSE) publishes its brief guide on manual handling at work3 (INDG143) to help employers reduce the risk of musculoskeletal injury under the Manual Handling Operations Regulations 1992. While workplace regulations vary by jurisdiction, the way HSE breaks down handling tasks is useful for any group moving materials.
HSE's guide aligns the risk assessment process with simple risk filters to identify low-risk tasks across four common actions:
* Lifting and lowering operations. * Carrying operations across a room or corridor. * Pushing and pulling loads (such as carts or wheeled cases). * Handling while seated at a bench or table.
Practical habits for moving assembly parts
Before anyone picks up a box or shifts a finished frame into place, pause and plan the move:
* Break down bundles: Unpack boxes on a table or near the delivery point so you carry single components instead of a heavy carton whenever practical. * Check the route: Clear cords, packaging, and tools off the floor before carrying long parts through a room. * Share awkward loads: Assembled frames are wide even when they are not heavy. Two people carrying a frame can see around corners and set it down without twisting. * Use wheeled aids: Where you need to move bins of parts across a venue, pushing a stable trolley is often easier on the back than repeated carrying trips, provided the floor is clear and you check the pushing and pulling path first.
What should a build day organiser plan?
An organiser who rushes a volunteer crew to finish before lunch invites shortcuts. People skip clamps, leave cords across walkways, and work tired.
An organiser should allow sufficient time and resources for each stage, check that people have the skills and instruction for their tasks, provide welfare facilities and first aid, keep exits clear, and supervise tool use throughout the session.
Allowing time, skills, and welfare
If you are organising a group build or looking at how a café can double as an event space, the decisions you make before people arrive set the safety level for the whole day. In Great Britain, HSE's guidance on commercial client roles under CDM 20154 explains how a commercial client influences health and safety on construction projects. A small furniture assembly day may not count as construction work under your local law, so you must check which rules apply in your jurisdiction. Even so, the core management principles from HSE's client guidance translate directly to running a safe build session:
* Allow sufficient time and resources: Under CDM 2015, clients must allow sufficient time and resources for each stage of a project. In a build session, rushing is what makes people hold parts by hand instead of clamping them. * Check skills and capability: Commercial clients must make sure those appointed have the skills, knowledge, experience, and organisational capability for the work. For a beginner build day, that means reading the operator's manuals ahead of time and ensuring everyone is properly trained to use a tool safely before switching it on. * Provide suitable welfare facilities: Make sure participants have access to rest areas, drinking water, washrooms, and first aid from start to finish.
Running the room on the day
We think a short, calm briefing before the tool cases open prevents more trouble than any poster on the wall. Walk everyone through the supplier's assembly steps, show where the clamps and safety glasses are kept, and point out the "Out of service" tags so anyone who spots a frayed cord or swollen battery stops using it immediately. Keep walkways, doors, and exits free of cartons and offcuts, and assign someone experienced to watch the floor while people are learning on our planned events page.
Conclusion
Safe assembly comes down to intact tools, clamped workpieces, sensible lifting, and an unhurried schedule. Follow the supplier's manual and stop whenever something looks damaged.
About Parti
Parti by Edgeware is Edgeware's first industry solution. Parti Race is a build day where people put karts together from frame profiles with a drill, and the events page shows photos of it. The first café is planned for Hangzhou and is not open. This guide is general information, with a safety focus, for first-time builders and people organising a build day, not a manual for any product, and the instructions that come with your own parts and tools come first.
Sources
- CCOHS: Powered hand tools, electric tools, basic safety: Covers tool and battery inspection, grounding, PPE, clamping workpieces, and safe operating habits.
- CCOHS: Powered hand tools, drills: Details drill bit selection, chuck safety, eye protection, clamping small stock, and drilling practices to avoid.
- HSE: Manual handling at work, a brief guide: Outlines employer duties and simple risk filters for lifting, carrying, pushing, pulling, and seated handling.
- HSE: Commercial clients, roles and responsibilities (CDM 2015): Explains how project organisers allow time and resources, check skills, and provide welfare facilities.