Pop-up fixtures: should you hire, buy or build?
Pop-up setup and teardown eat your weekend and your budget. One wrong fixture choice leaves you hauling scrap at midnight. This guide gives you a clear decision sequence.
Published
You can hire, buy, or build pop-up fixtures, or ask the landlord to include shelving. Hire for a one-off event without storage, buy when you will reuse units and can store them, and build only with time, training, and safe tools.

Every short retail event forces a trade-off between cash, labour, and what happens on Sunday night when the doors close. Below, we compare your options, look at transport and tool risks, plan the aftermath, and walk through a checklist to pick your path.
What are the three ways to get pop-up fixtures?
You walk into an empty unit or mark out an event pitch. Your stock is in boxes. Now you need tables, rails, and shelves fast.
Your three core options are hiring display units from a supplier, buying ready-made furniture and shelving, or building homemade fittings yourself. Sometimes a fourth option opens up: negotiating with the venue landlord to leave existing shelving in place.
In the UK, Square UK's pop-up shop guide1 notes that a pop-up can run for a single day, a few days, weeks, or months, in spaces ranging from a countertop box or a single shelf in someone else's store to a trade stand, an outdoor stall, or a standalone vacant shop. Because the format varies so widely, there is no single right way to source your display units.
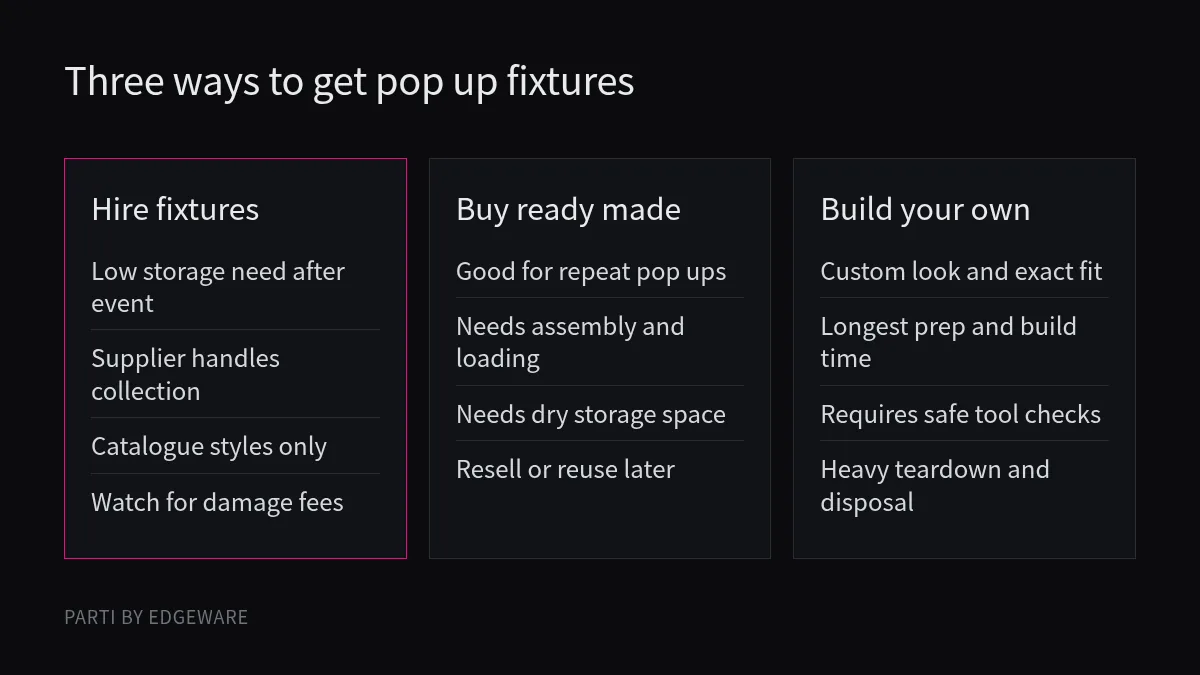
Comparing hire, buy, and build
Before you spend money, ask the landlord or organiser what is already in the room. As Square UK points out, you can sometimes negotiate with your landlord to include shelving in the agreement, which saves both money and transport effort. When you have to provide your own, the three routes work quite differently:
| Option | Upfront effort | Control over look | What happens at teardown |
|---|---|---|---|
| Hire | Booking, delivery coordination, condition check | Limited to hire catalogue stock | Supplier collects or you return to depot |
| Buy | Sourcing, ordering, flat-pack assembly | Wide retail choice, customizable | You pack, load, transport, and store |
| Build | Design, material run, cutting, finishing | Complete control over style and fit | You dismantle, haul, store, or dispose |
Square UK highlights that store fit-out, furniture, display units, and signage sit alongside rent, staffing, insurance, and health and safety risk assessments in your budget. If you are working with a small budget, they note that you can achieve your fit-out and display in a homemade way, especially if a laid-back, thrown-together feel suits your project. However, they warn that homemade fittings and signage still need to reflect well on your brand, and that you must never scrimp on safety. While planning your display units, keep your pop-up shop fit-out checklist close so power, lighting, and payment gear do not get forgotten.
What does each cost you in time and risk?
The price tag on a plinth or rail is only half the story. Setup day injuries, faulty power tools, and heavy vans drain small teams.
Hiring costs admin time and deposit risk for damages. Buying costs assembly hours and heavy lifting in and out of venues. Building takes the most fabrication time and adds electrical and tool hazards alongside manual handling risks.
Rules around workplace safety vary by jurisdiction, and your own venue contract and local authority decide what applies on site; this section draws on official guidance from Great Britain and Canada and is not legal advice.
Manual handling during bump-in and bump-out
Whether you buy flat-pack counters or build timber tables, someone has to carry them from a vehicle into the venue. In Great Britain, the Health and Safety Executive brief guide on manual handling2 explains employers' duties under the Manual Handling Operations Regulations 1992 and outlines how to reduce injury risks from lifting, lowering, carrying, pushing, and pulling. Even if you staff your pop-up with friends and family (which Square UK notes many small businesses do, reminding owners that hiring paid staff brings minimum wage laws into play), heavy awkward loads hurt backs and derail opening morning. Use wheeled skates or trolleys so you push instead of carry, keep units modular so no single piece is too heavy, and evaluate the path from loading bay to pitch before arrival.
Tool safety if you build your own fixtures
Building displays on a tight deadline is where corners get cut. In Canada, the Canadian Centre for Occupational Health and Safety guide to electric tools3 sets out basic safety rules that apply well to any workshop or on-site build:
* Inspect before every use: Check handles and body casings for cracks, make sure auxiliary handles are secure, and inspect power cords for fraying or insulation faults. Check battery packs for cracks, leaks, or swelling. * Tag and remove defective tools: If a tool is damaged, tag it clearly as "Out of service" and replace it immediately. Have repairs done by a qualified person instead of field repairs at the venue. * Check grounding and insulation: Use tools that are properly grounded with a three-prong plug in a grounded outlet, double-insulated, or powered by a low-voltage isolation transformer. Never remove the third grounding prong, and test grounding with a continuity tester or ground fault circuit interrupter (GFCI). * Disconnect before adjustments: Switch off the power or remove the battery before changing blades, bits, or attachments, and remove any adjusting wrenches before turning the tool back on. * Hold the workpiece and wear protection: Use clamps or a vice so both hands stay on the tool, keep cords clear of the cutting path, wear appropriate personal protective equipment like safety glasses, and use outdoor extension cords marked "W-A" or "W" for outdoor stalls.
We do not know your workshop setup or how comfortable you are with saws and drills, so our honest view is simple: if you cannot follow every check above without rushing, hire or buy your fixtures instead.
What happens to the fixtures after the pop-up?
Sunday evening arrives and the crowd leaves. You have two hours to clear the floor, and a pile of shelves has nowhere to go.
Hired fixtures go back to the rental company. Bought or built fixtures must be dismantled, loaded into a vehicle, and stored in a dry space you pay for, or sold and reused before your lease ends.
When you plan your opening, plan your exit at the exact same time. A short pop-up gives you no breathing room at the end of the tenancy.
The hidden burden of storage and transport
Hiring shines at teardown. You wrap the items according to the hire company's rules, hand them over, and walk away without needing a lock-up garage or warehouse bay. When you buy or build, the fixtures become assets you have to manage between events. If your business runs out of a spare bedroom or a small studio, storing six tables and four garment rails for three months until the next market can cost more in self-storage fees and van journeys than the furniture was worth.
Leaving, reusing, or selling fittings
Before you unscrew anything attached to the walls or floor of a vacant shop, check what your short-term occupancy agreement says about reinstatement and taking your shop fittings with you. Damaging a landlord's wall to rip out a cheap shelf will eat your security deposit.
If you own the fixtures and know you will not run another event soon, figure out whether you should sell or reuse old shop fittings ahead of teardown day. Lining up another local trader or maker to collect your plinths straight from the venue on the final evening saves you a double lift and a trip to the tip.
How do you decide?
You have a confirmed date, a floor plan, and a budget cap. Sitting on the fence delays your merchandising plan and squeezes setup time.
Decide by working through four questions in order: what the venue already includes, how many times you will run a pop-up this year, where fixtures will live between events, and whether your team can safely build and lift them.
Follow this sequence to lock in your choice without second-guessing yourself halfway through the week.
Step 1: Audit the venue and ask the landlord
Start with the room itself. Ask the venue operator or landlord for an inventory of existing counters, rails, or shelving, and ask whether those items can stay in place for your dates. If the space is a tiny alcove or a single shelf inside an existing store, your fixture list may drop to a few tabletop risers. You can also explore how modular layouts work on our room concept page as you sketch your floor plan.
Step 2: Count your confirmed events and storage space
Look at your calendar honestly. If you have one weekend event booked and no dry, ground-floor storage space at home or work, hire your core units. If you have a seasonal run (Square UK notes how some operators run pop-ups across the September to January window) or a series of trade stands where the same kit travels from hall to hall, buying sturdy, collapsible fixtures makes sense because you spread the effort across multiple openings.
Step 3: Match the build to your brand and safety limits
Only choose the self-build route when a bespoke or homemade look directly helps your brand experience and you already have access to tested tools, clamps, personal protective equipment, and enough clear days before bump-in. Mix and match if needed: hire the heavy perimeter rails and tables, buy lightweight folding crates for stock, and hand-make only the small tabletop displays and signage that fit in the boot of a car.
Conclusion
Start by asking the landlord what stays. Then match hire, buy, or build to your storage space, repeat dates, and safe lifting limits.
About Parti
Parti by Edgeware is Edgeware's first industry solution. We are designing a café where one room can serve several uses, reset by hand between them. We have not published how long a reset takes, because we have not tested it. That is a design aim, not a result. The first café is planned for Hangzhou and is not open. See the room and how the floor connects. This guide is for brands, makers and organisers running a short event. It is general information, not legal advice, and your own contract and local rules decide.
Sources
- Square UK: How to open a pop-up shop: Practical UK overview of pop-up formats, cost categories, landlord shelving negotiation, and homemade fit-out considerations.
- HSE: Manual handling at work, a brief guide: Great Britain guidance on assessing and reducing injury risks from lifting, carrying, pushing, and pulling at work.
- CCOHS: Powered hand tools, electric tools, basic safety: Canadian checklist for inspecting electric and battery hand tools, grounding, PPE, and safe workshop practices.